Understanding Barbecue Fundamentals
The most important element to making great barbecue at home is not the dry rub, some secret bbq sauce, or specific kind of wood smoke. Those things make barbecue, barbecue, but every region has different opinions on what is best. The one thing all great bbq has in common (and the first step you have to understand and execute) is collagen to gelatin transformation.
Today we are going to break down this process and how it happens when barbecuing pork ribs, beef brisket, a whole chicken, and even a head of cauliflower. In addition, I’ll go over seasoning, smoking, dry rubs, and sauce options.
The goal of this article is to help you understand the fundamentals of smoked barbecue and give you confidence and a base level of knowledge to get started.
Collagen to Gelatin Transformation
A quick primer on collagen:
Collagen is a type of connective tissue that is invisibly scattered throughout the muscle, often surrounding fibers and sheaths. Basically, it's what keeps the muscle together when raw.
But as we cook meat and it reaches a certain temperature, that collagen liquefies and no longer keeps the tight hold on the muscle fibers.
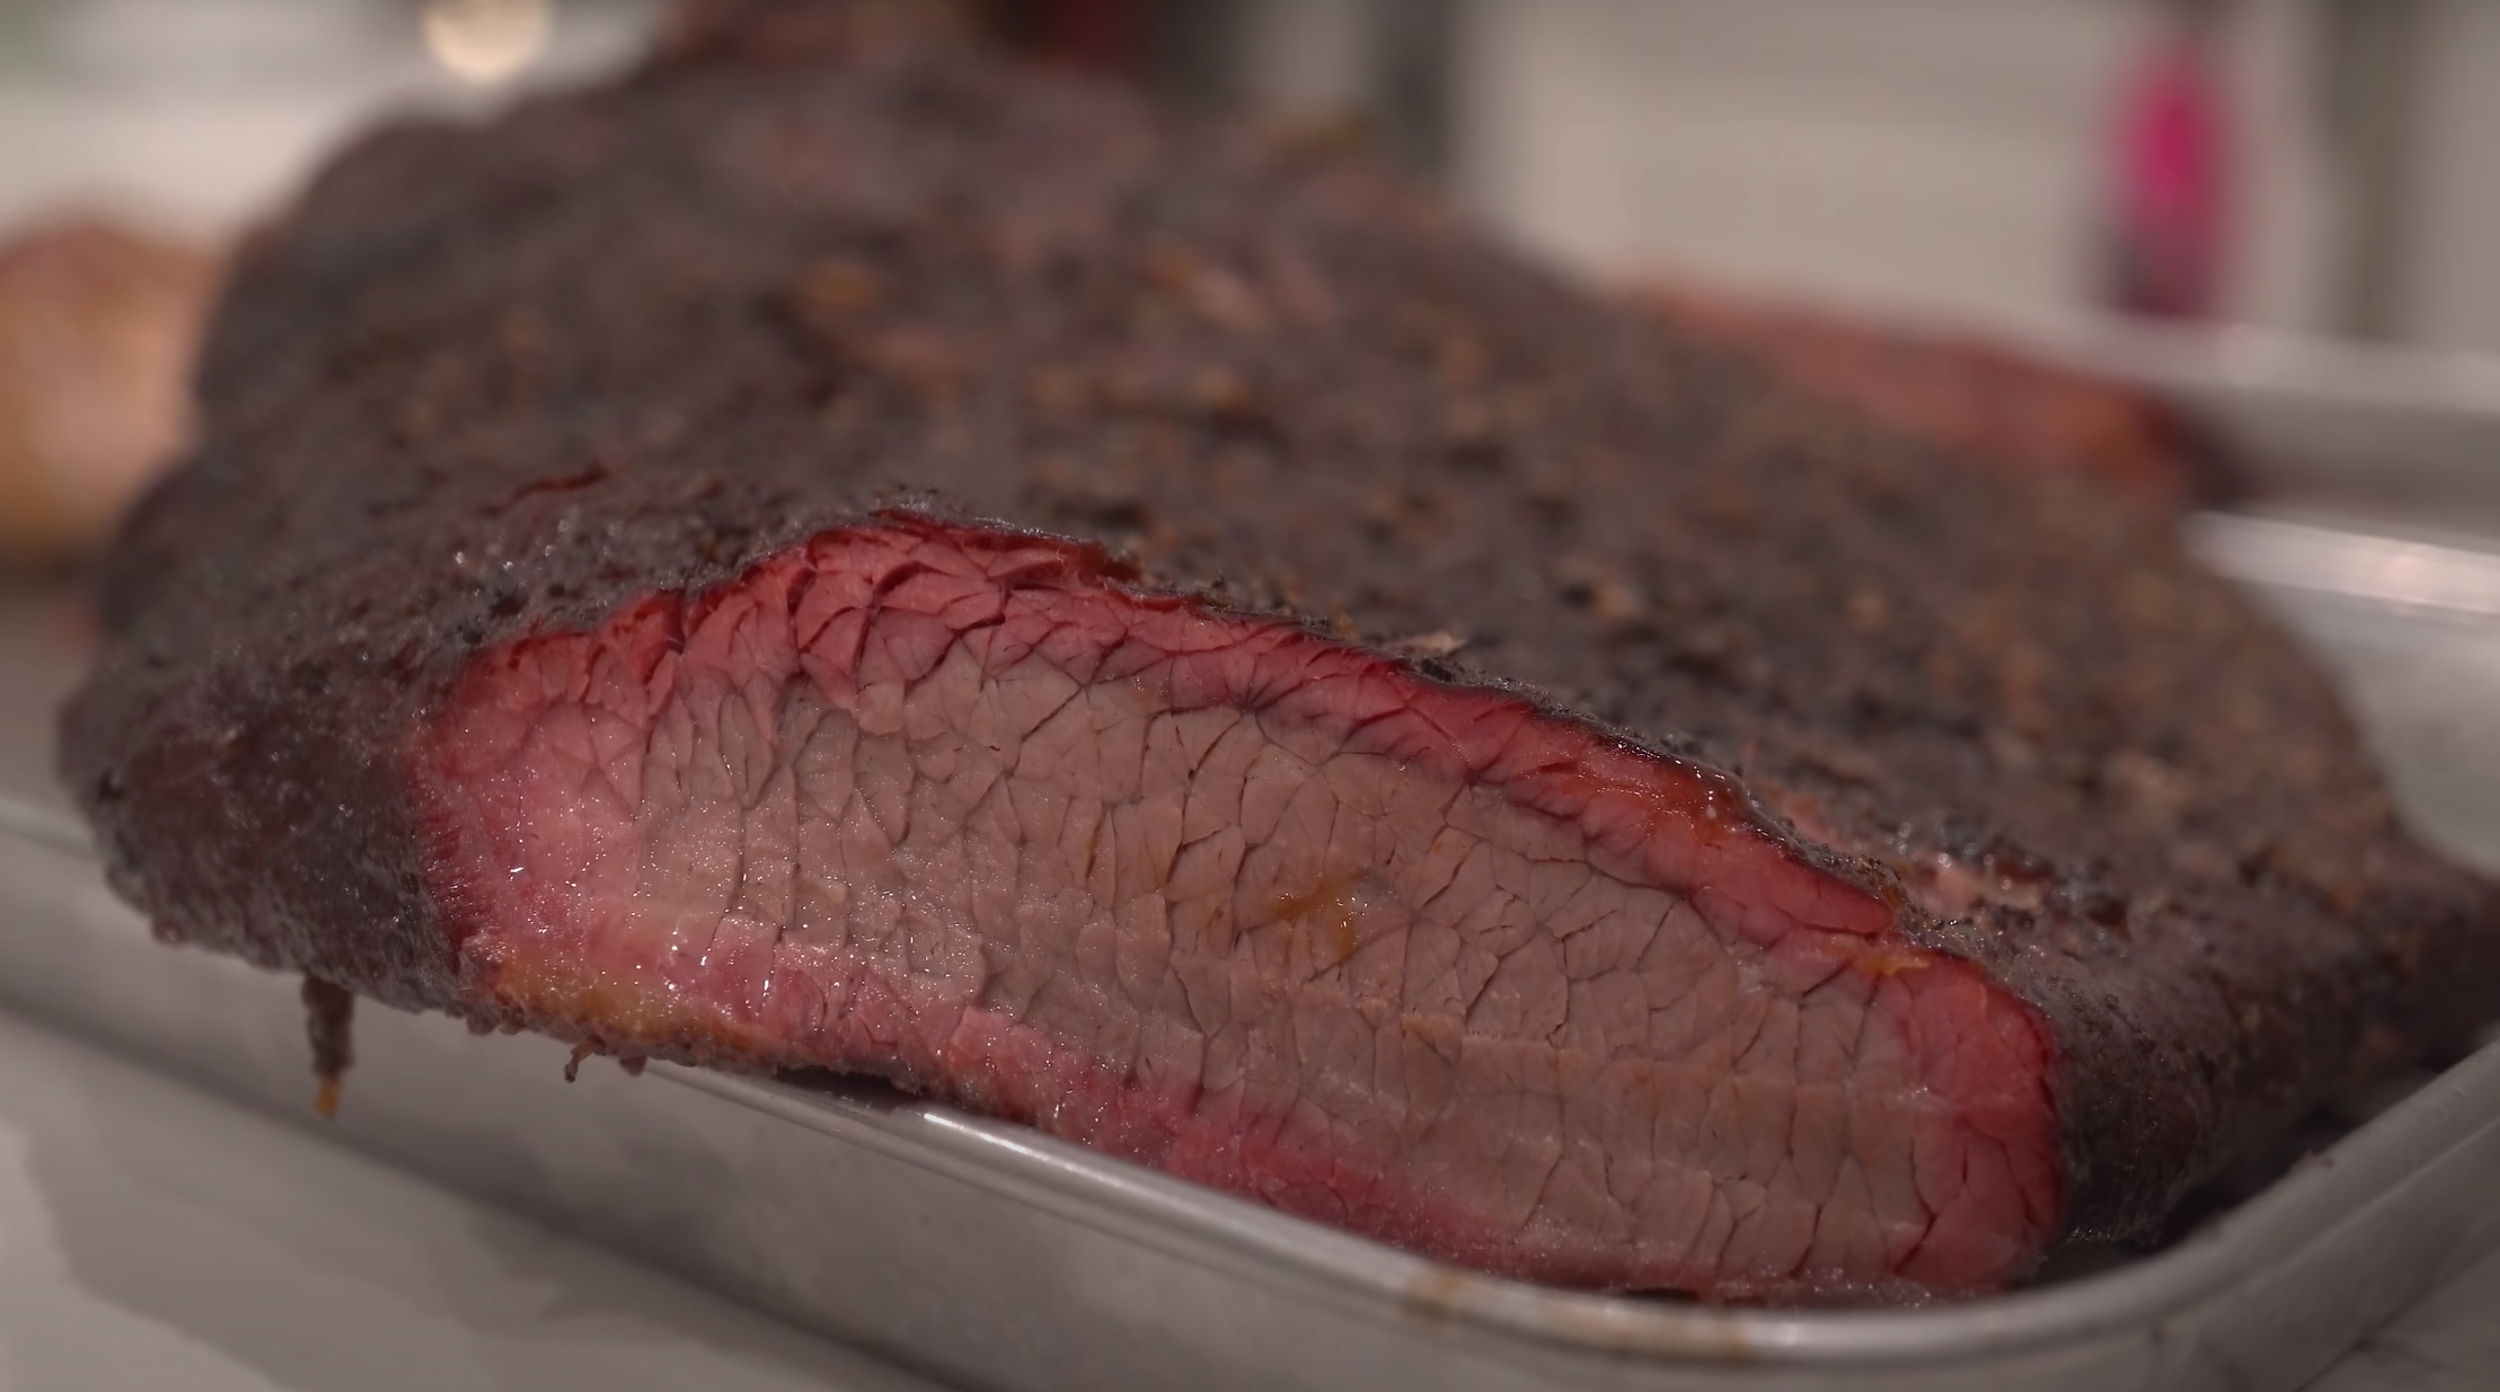
Just look at this cooked brisket. I can easily pull apart with my hands.

This is important for eating texture because when collagen melts and forms gelatin it makes the meat tender and succulent.
How does it make the meat more succulent? As the collagen melts into gelatin, it is then able to absorb 10 times its weight in water. Any water that is released during cooking is absorbed into the gelatin, which allows the meat to stay moist.

(On Food and Cooking, Harold McGee)
Luxurious beef brisket slices that just melt in your mouth, pork ribs that bite clean off the bone, or tender chicken thighs are all products of this transformation.
Take a look at this photo from The Science of Great Barbecue and Grilling:
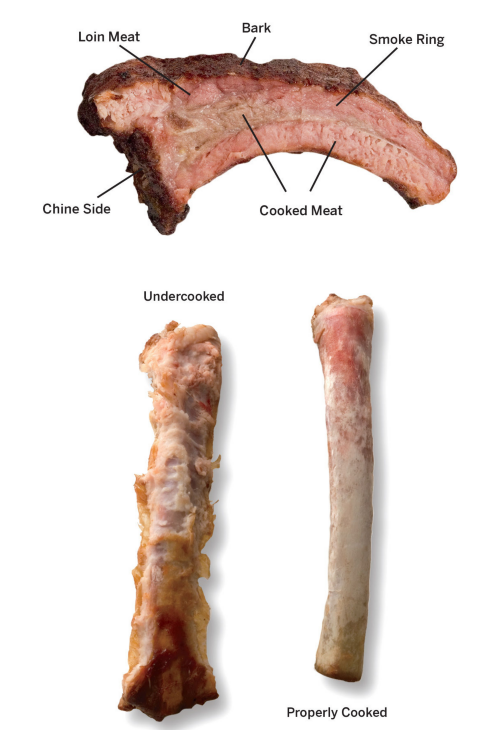
Now personally, I'd rather have a properly cooked rib in the oven with just salt than an undercooked and tough rib with the best rub and bbq sauce that was smoked.
If that collagen to gelatin transformation hasn't happened it ruins the eating experience.
Though while this may sound complex, this is supremely easy to achieve.
How do we ensure this happens?
Collagen breakdown is a product of Temperature and Time. That's right, for anyone starting: all this means is you need a quality thermometer. I like the latter half of this quote from meathead regarding thermometers:
As with everything in barbecue, getting blue smoke is all about temperature control. Cooks who say they don’t need thermometers are either seasoned old-timers who learned at the foot of a master and have been doing it for years, or they’re macho knuckle draggers.
Goldwyn, Meathead. Meathead: The Science of Great Barbecue and Grilling (p. 21). HMH Books. Kindle Edition.
Seriously, if you invest in a quality thermometer and understand temperature control. you'll be able to make a great barbecue every single time.
Collagen starts to melt at 160 F (71 C) and all the way up to 205 F (96 C), but it's not like you can sear your brisket in 30 minutes, get it to 160, and have all the collagen melts at once — this process takes TIME too.
If you tried that, water would escape from the meat before enough gelatin has time to melt and hold onto it so you would be left with something tough and rubbery instead of succulent.
The important part is that the meat needs to spend enough time in this range for the collagen to melt, which is why barbecue methods are typically done low and slow in ranges such as 200 F to 275 F.
What this means for the home cook is you just need to monitor meat with a thermometer and wait. Now that we have the theory down, let's apply it to various cuts.
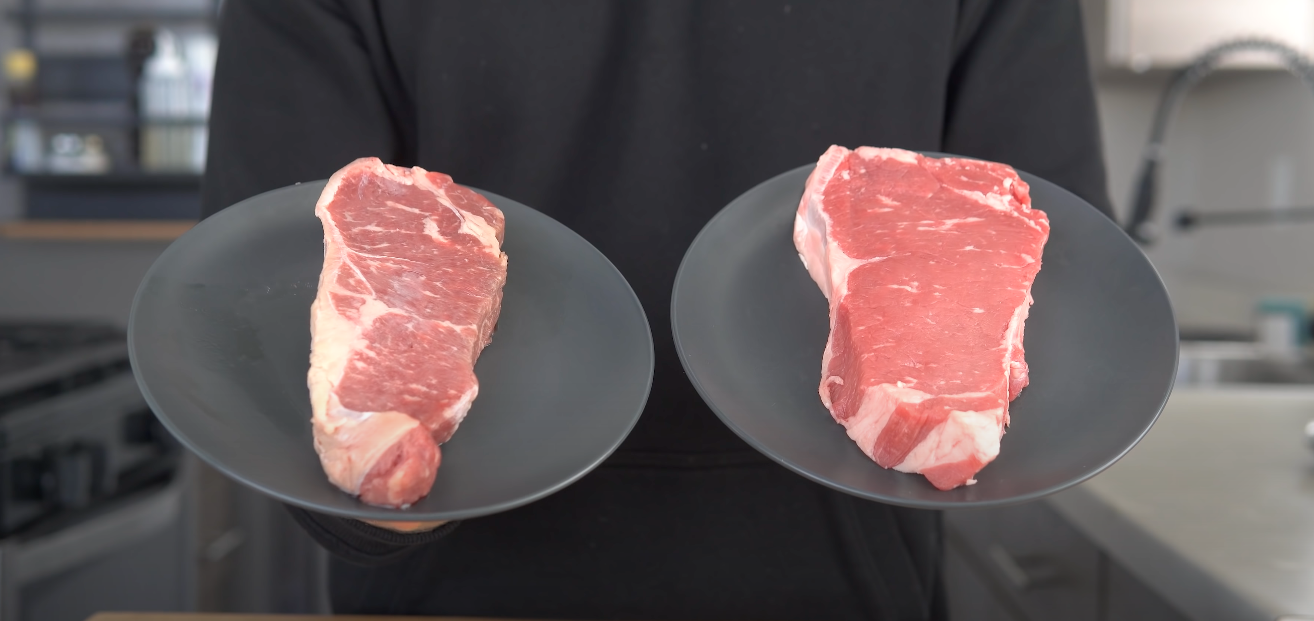
Cuts of Meat Breakdown
Different cuts have different amounts of collagen. For example: pork tenderloin, chicken, and turkey have less collagen than tougher cuts like pork ribs, shoulder, or beef brisket, so different amounts of time are necessary in the collagen liquify zone (160 F - 205 F).
Everyone has a different method for smoking. The goal of each of the case studies below is to walk you through the meat transformation process. Once you understand what needs to happen on a culinary level, you can use whatever techniques you prefer.
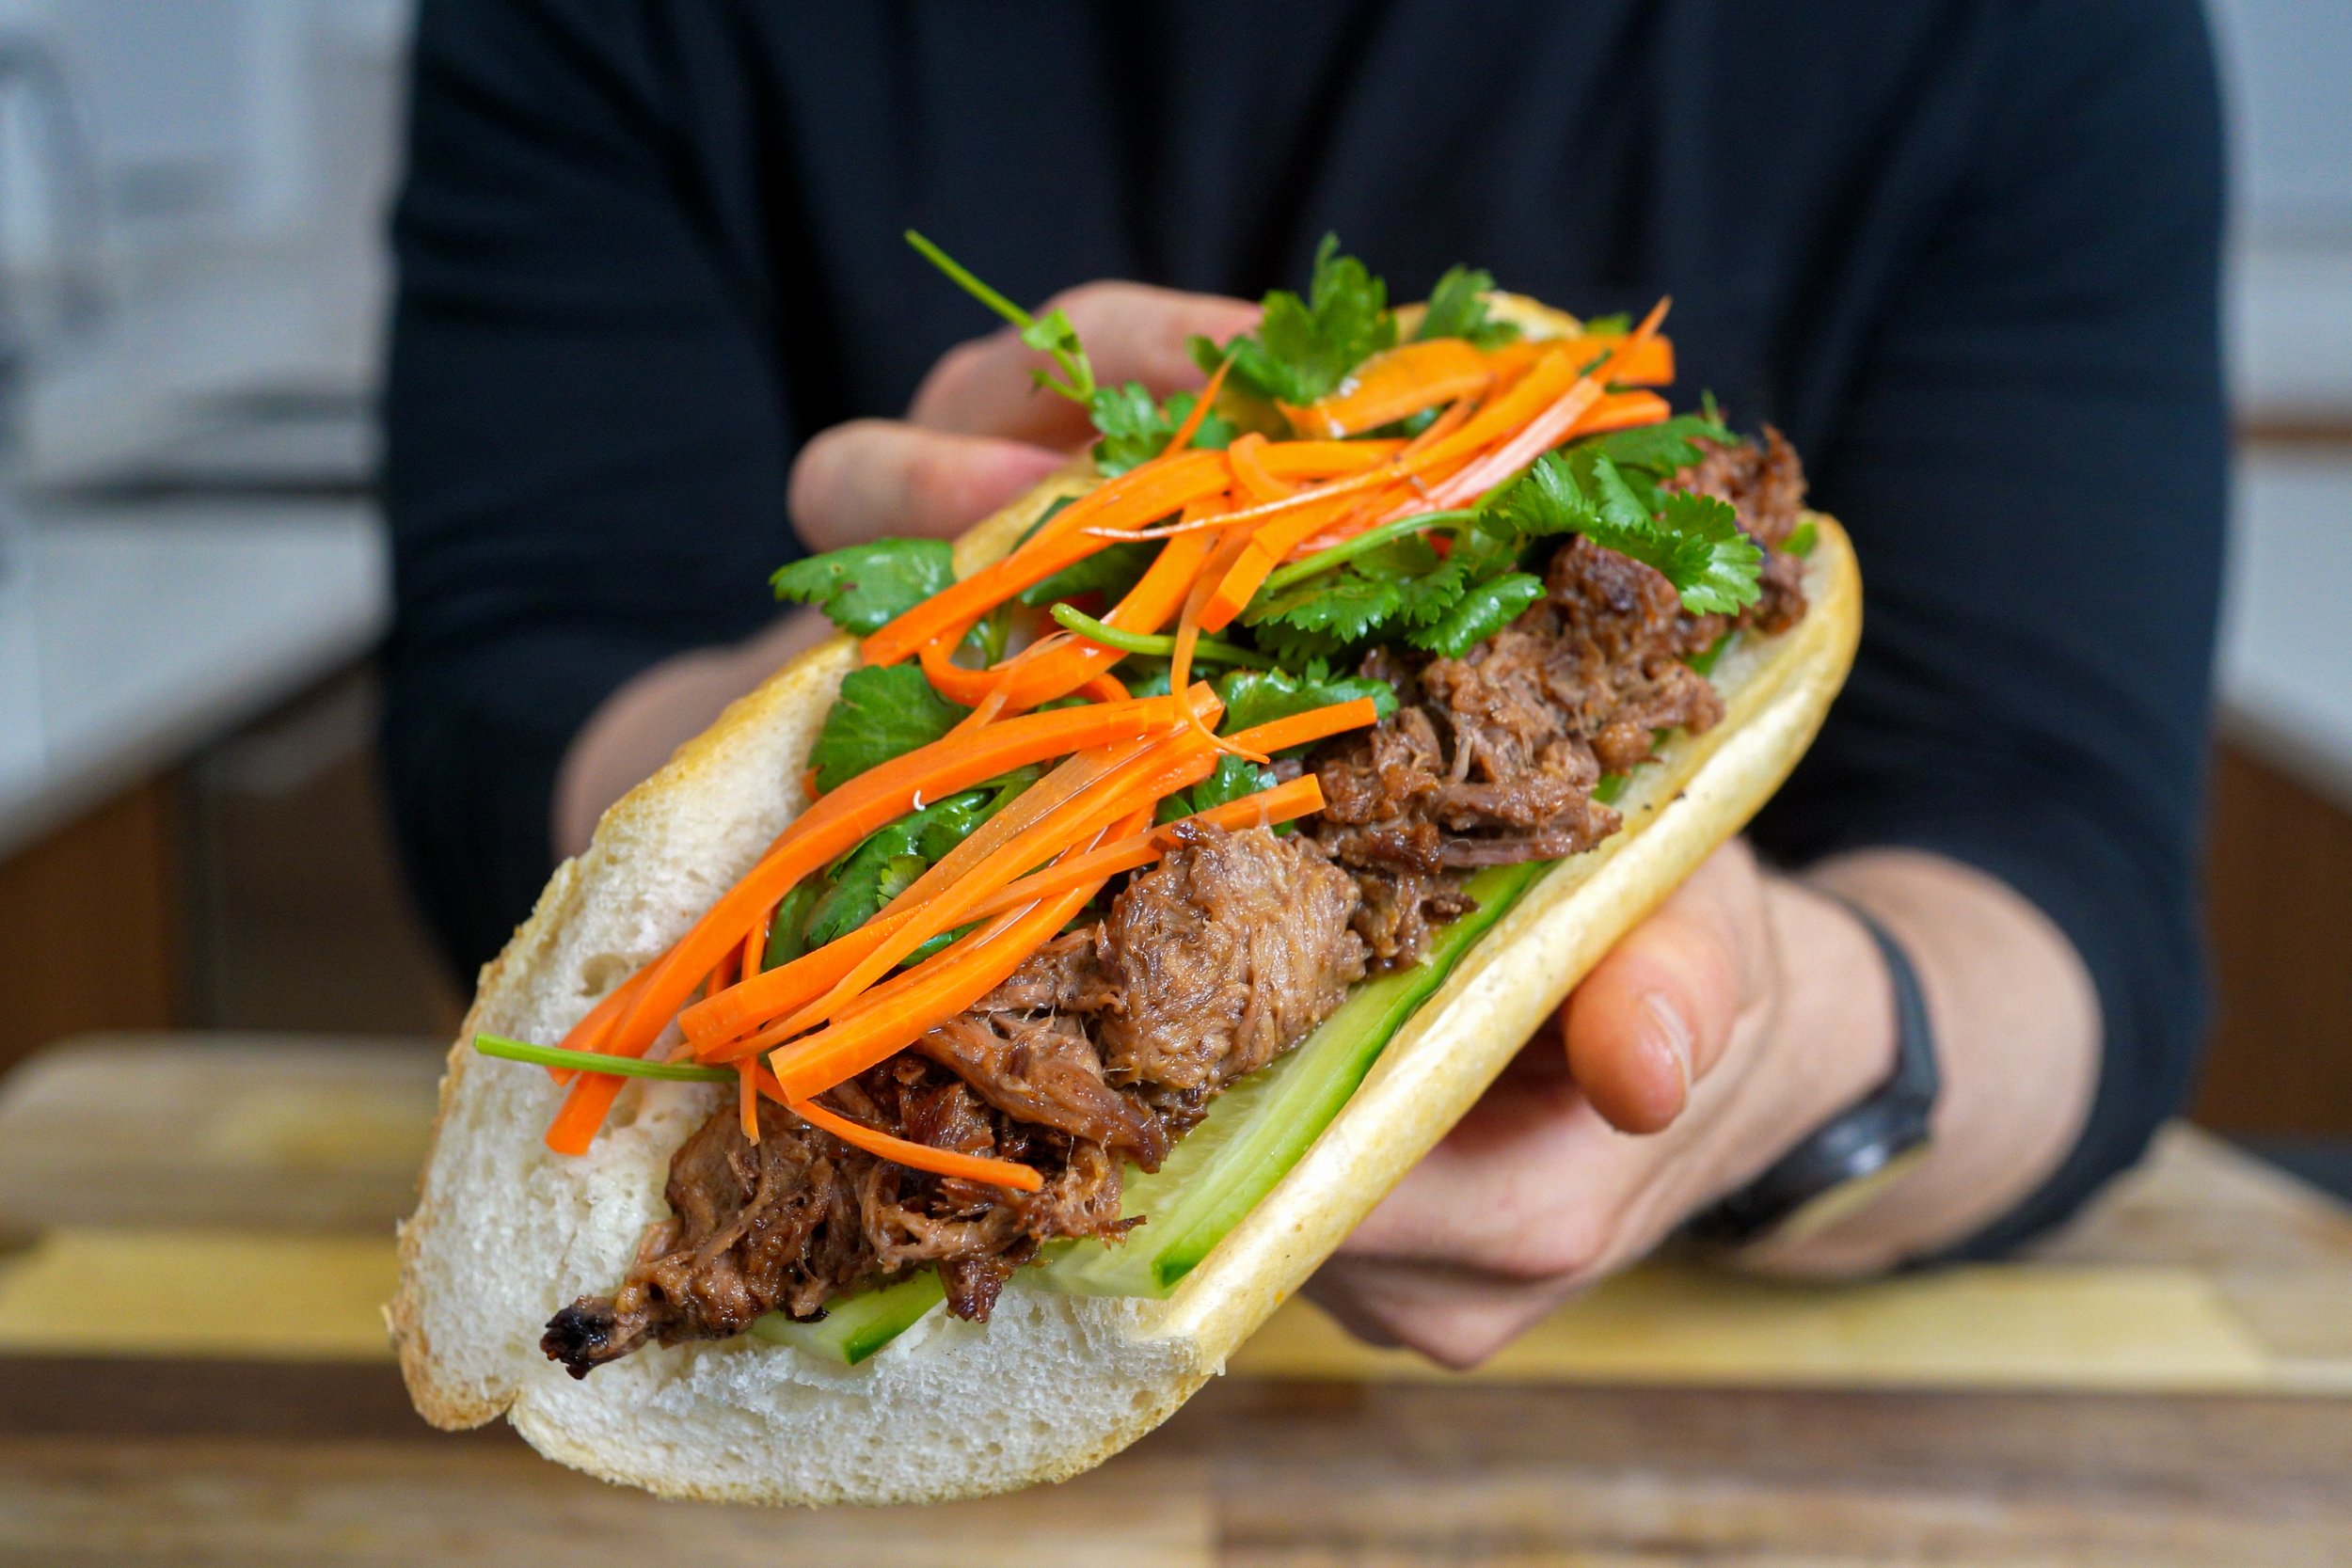
Brisket

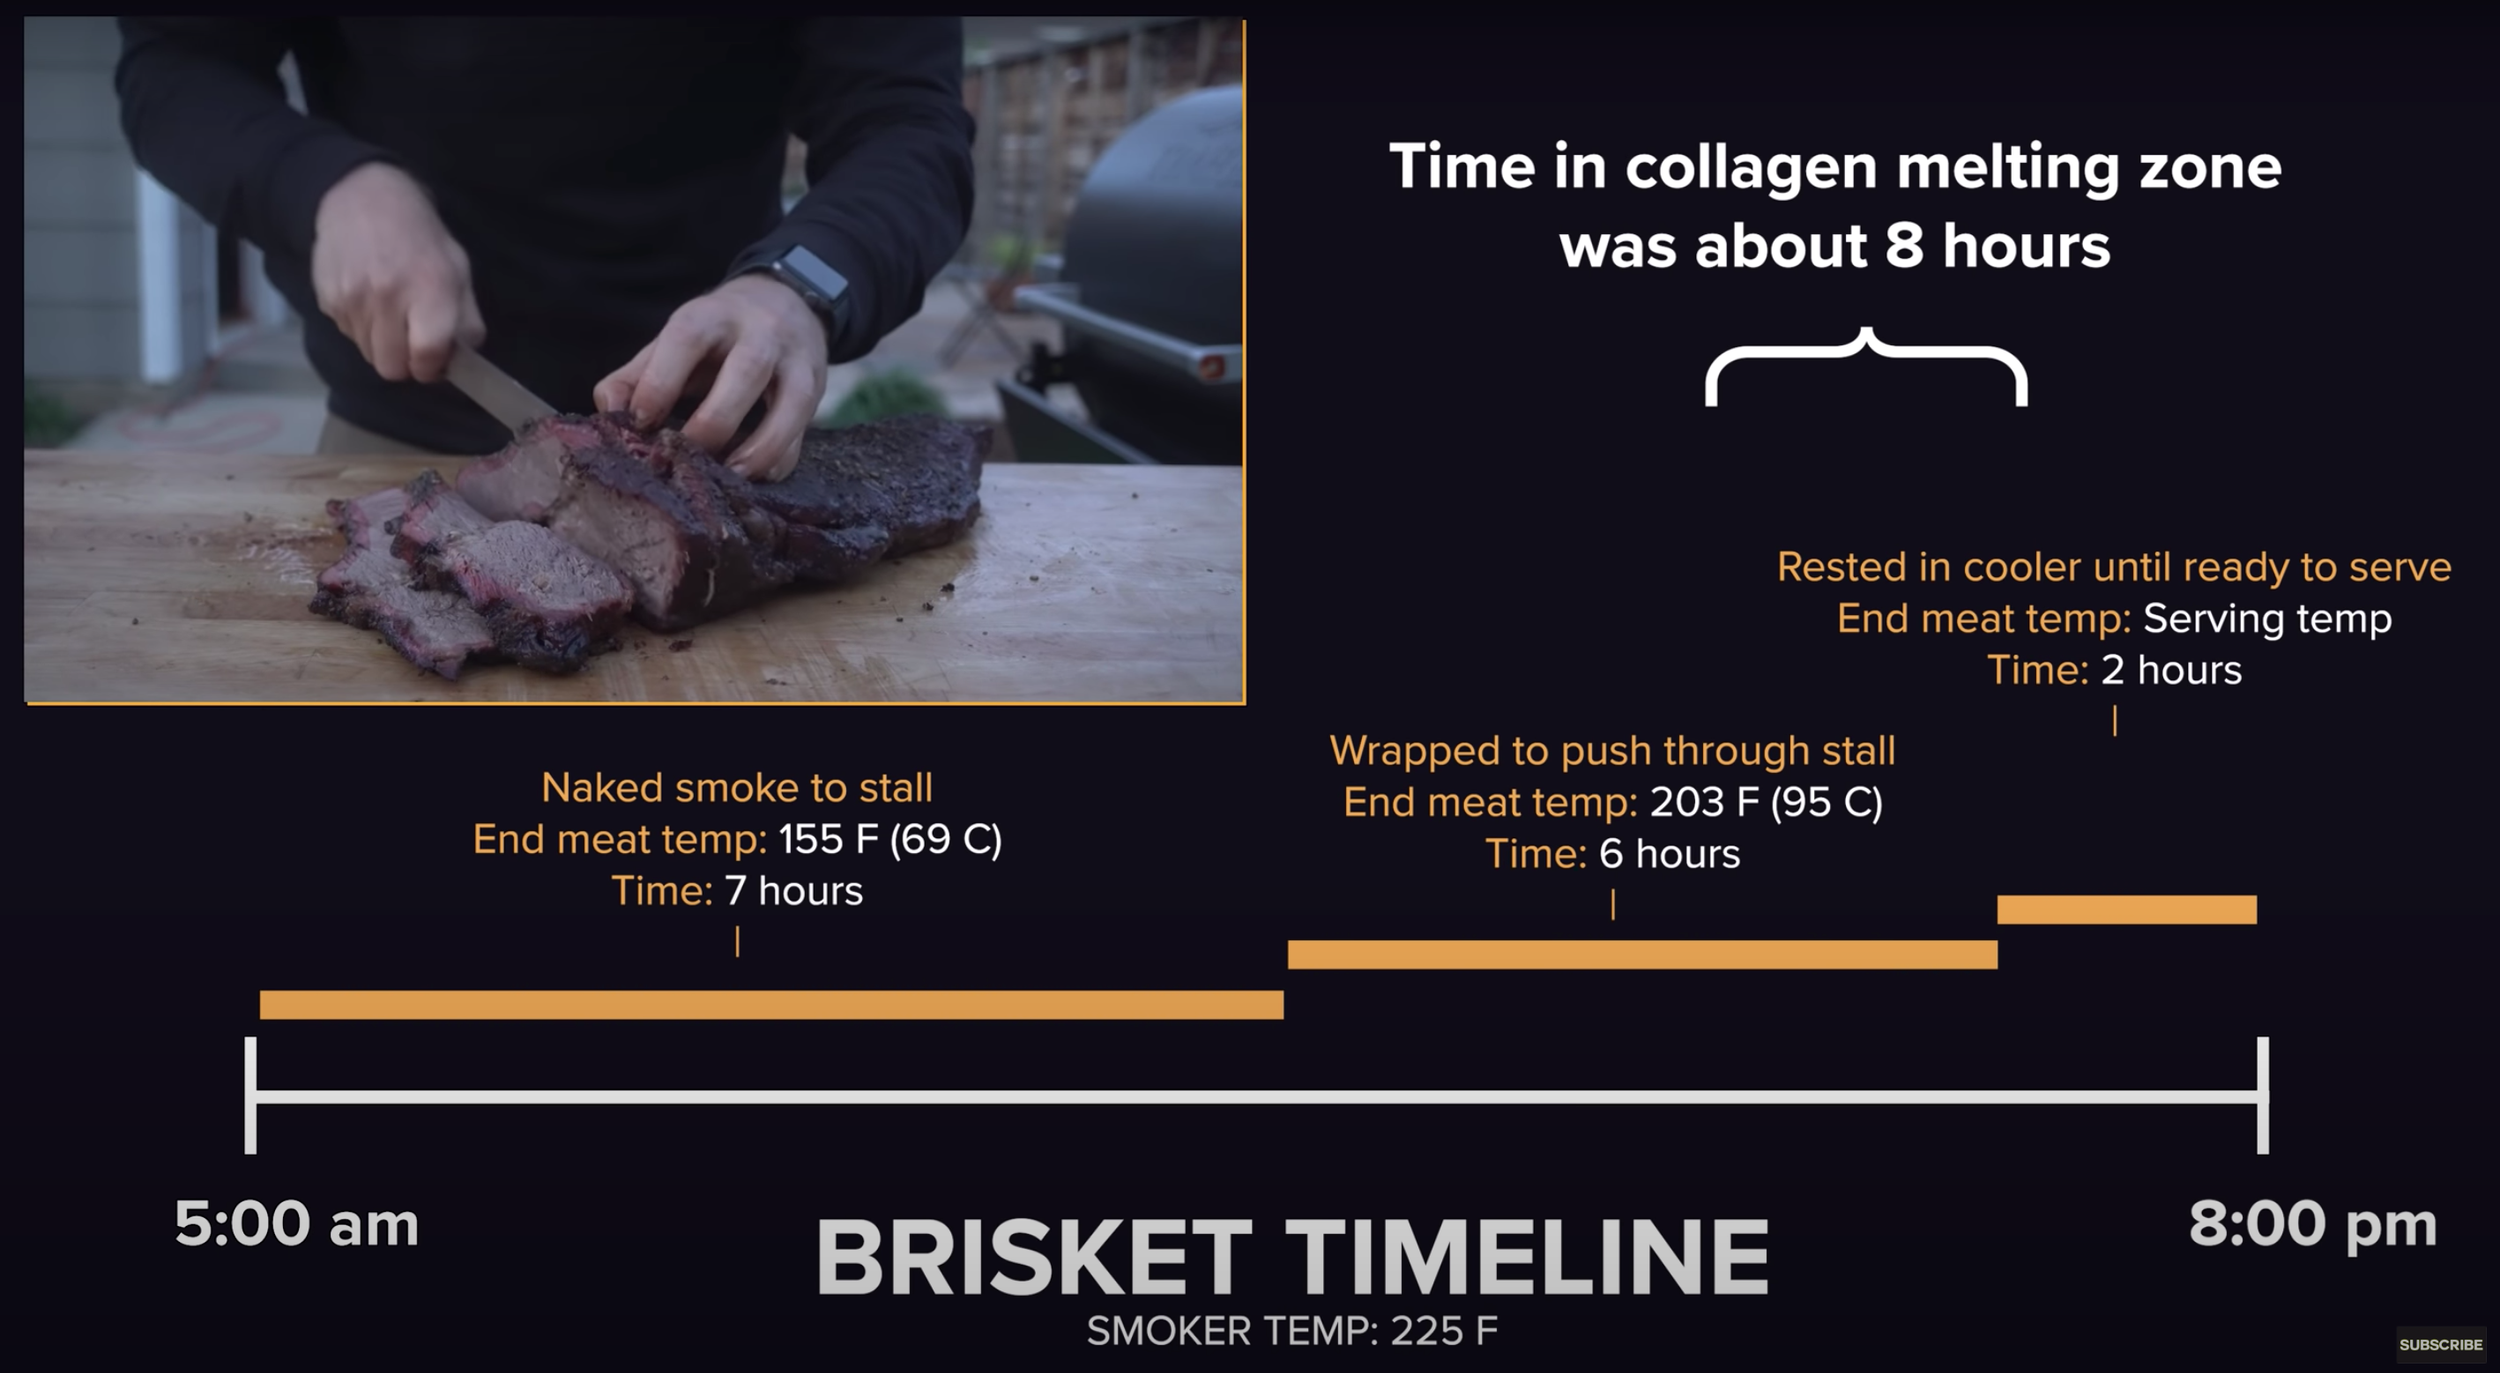
For my brisket, the smoker was set at 225 F and placed on at 5 am. It was smoked naked until it hit about 155 F. Then the stall happened.
Now a quick note on the stall. So this is a common thing that happens in smoking where the meat steadily rises and then the temp absolutely stalls for hours without budging and you start to worry if you are going to have dinner tonight.
The stall happens because of the moisture of the meat is released to the surface where evaporating cooling occurs.
If time does permit, you can just let the meat go. It will eventually move past. What many people (including top competitive barbecue teams) do is use the Texas crutch. This is as simple as wrapping the meat tightly in foil or butcher paper. Essentially you are creating a braising environment like a closed pot to move past the stall.
Potential cons of this method are less smoke development and the bark will moisten, but you can always let it dry out at the end.
To get past the stall, I wrapped the brisket in butcher paper and tossed it back on the smoker. It moved past the stall all the way up to 203 F, where it was pulled and placed to rest in a cooler for another hour before slicing and enjoying
If you want some further reading, check out Thermowork’s post on smoked brisket where they tried 3 different methods for smoking brisket. Again, I'm just focusing on the basics here. Let's talk ribs.
Ribs

Just like brisket, ribs have a significant amount of collagen, but are a much thinner cut of meat so they take less time.
For my ribs, the smoker was set at 225 Fahrenheit. The ribs were placed in the smoker unwrapped until they hit around 160 F.
Then I wrapped them and put them back in the smoker until they hit 200 Fahrenheit.
Lastly, I unwrapped and slathered them with sauce, then finished them on a higher heat at 400 F to sear the sauce for 30 minutes.
Thermometer Tip: Ribs can be a little tricky to take the temperature of so just make sure you are in the thick part of the meat for an accurate reading. If the bones come clean out, that's usually a good sign.
And again, if you want them literally falling off the bone, give the ribs more time in that heat zone, if you want them with a firmer bite, do a little less time.
Chicken
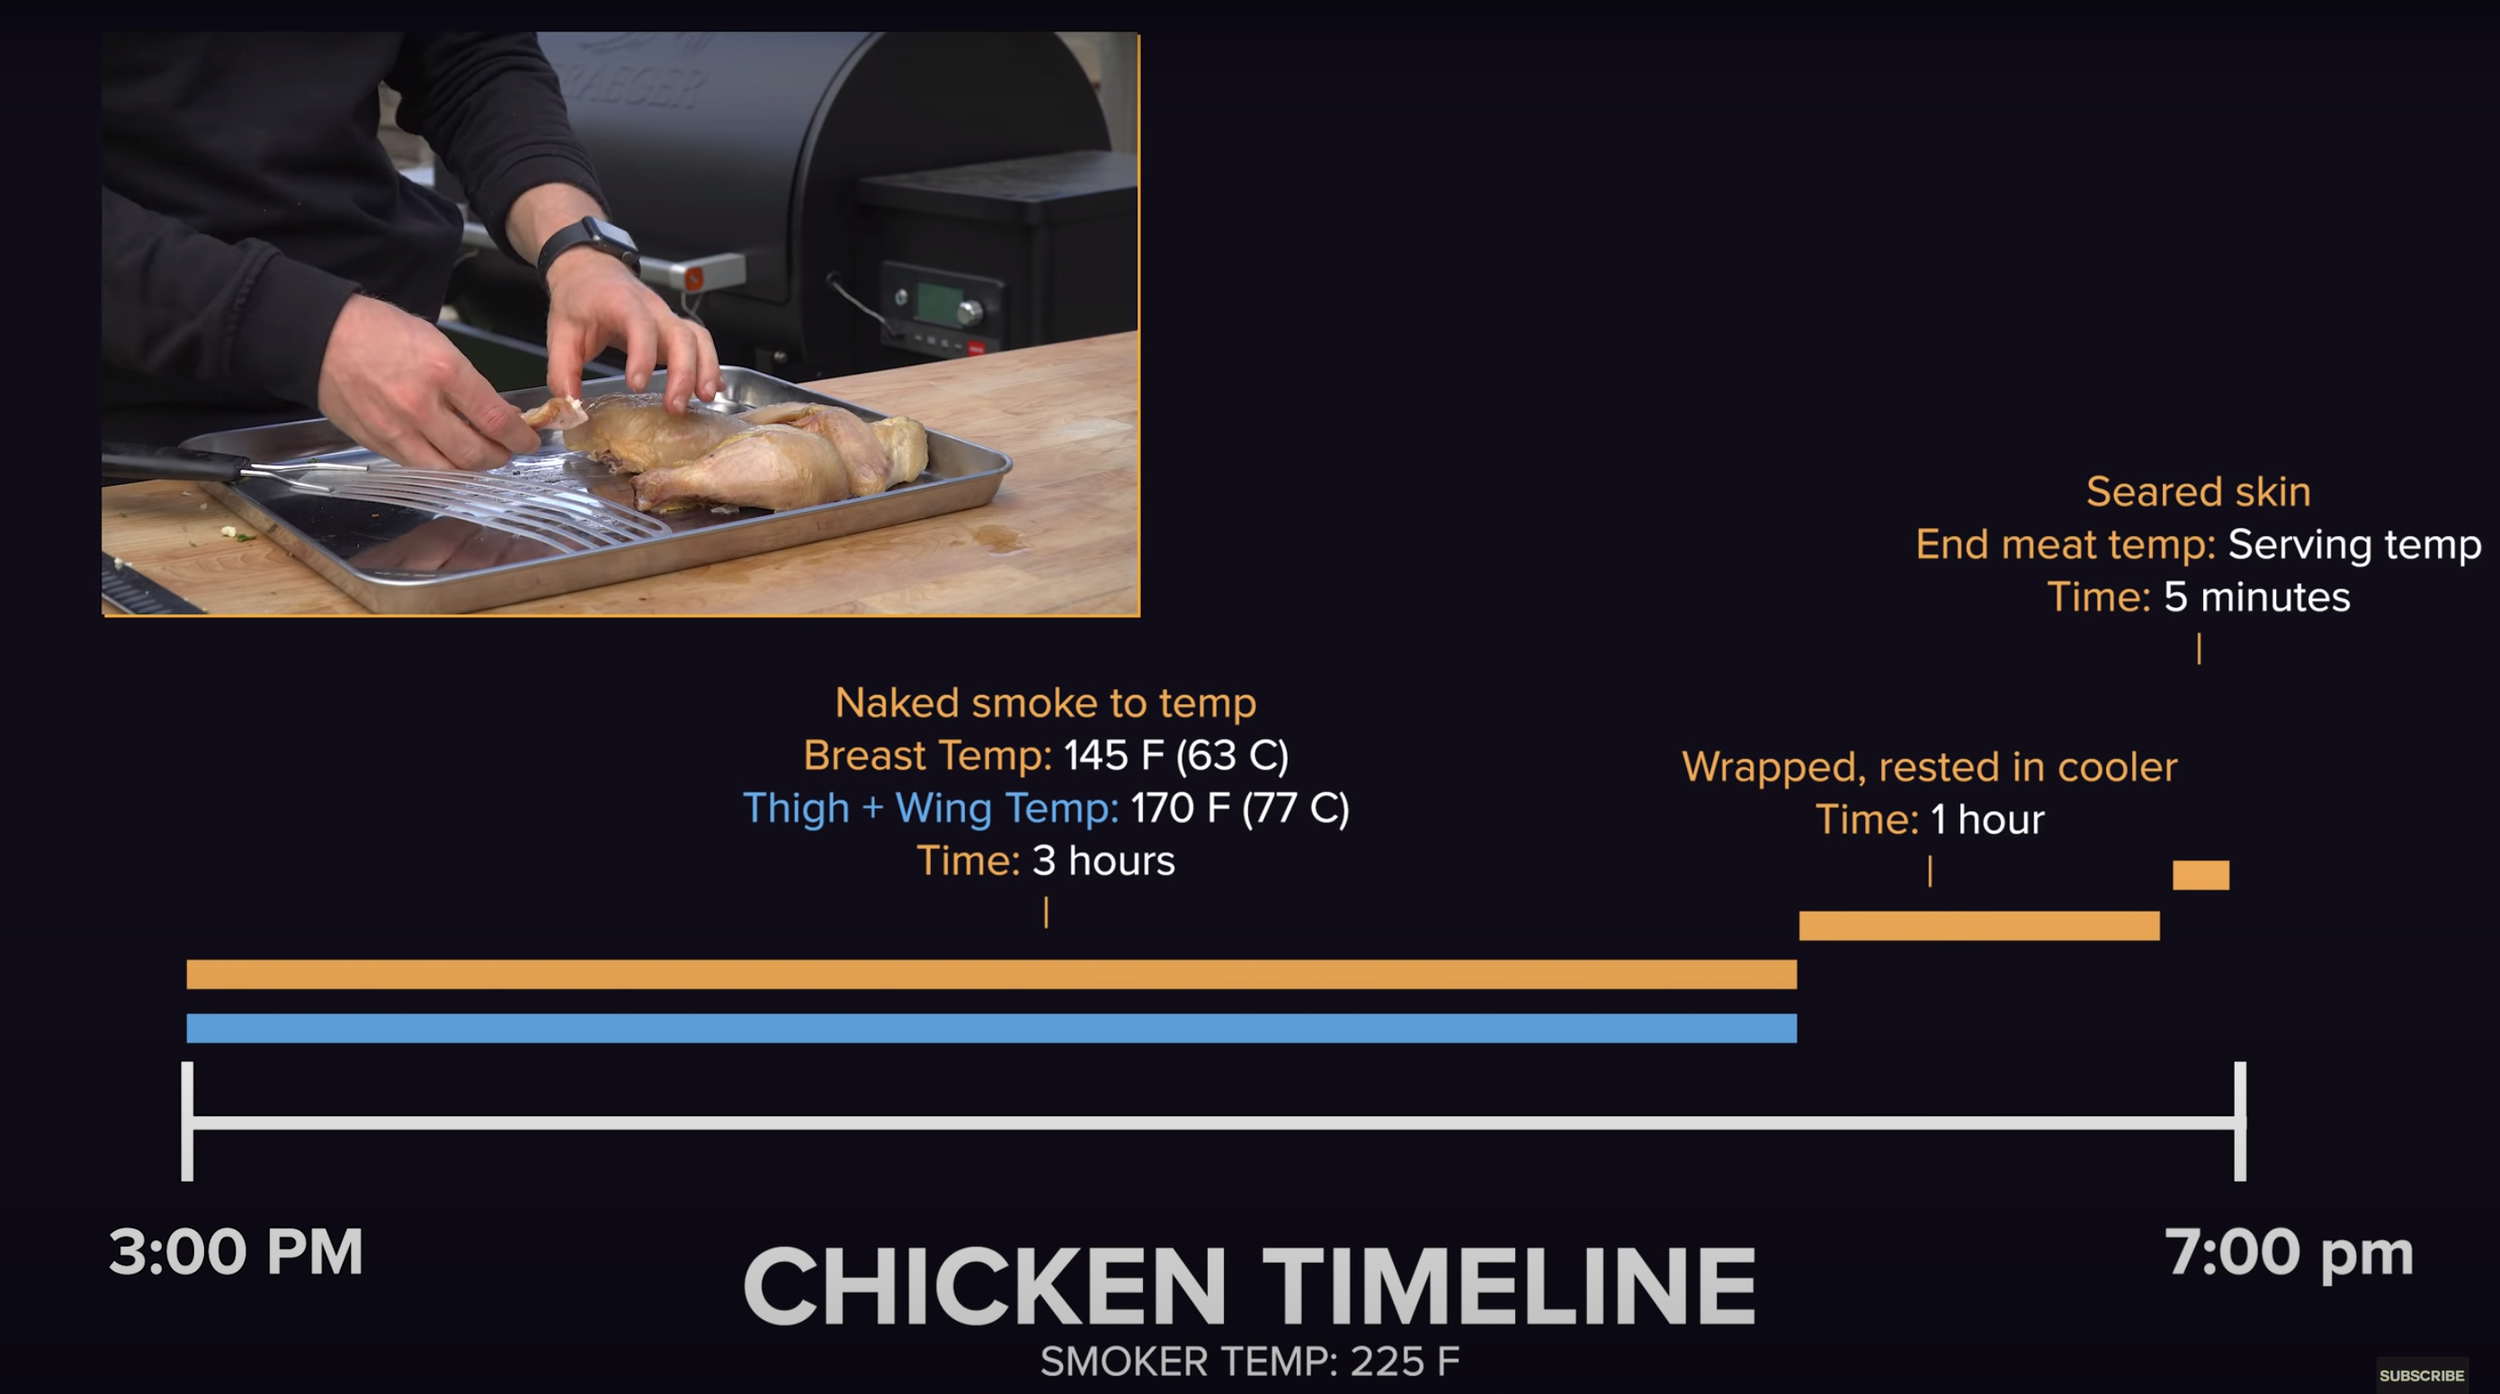
Chicken has much less collagen compared to ribs and brisket. I broke my chicken down into pieces and got the smoker started at 225.
The breast was smoked until it reached about 145 and the thighs until they reached 170, before being pulled off and wrapped and stored in the cooler.
Then right before serving I seared them at 400 degrees Fahrenheit to crisp the skin a bit.
Cauliflower
Lastly, my cauliflower was the last addition that I thought would be an interesting experiment for the video, but obviously, it has no collagen as a vegetable. So this was smoked until tender on the inside.
Collagen → Gelatin Conclusions
In conclusion, there are countless ways to smoke and cook bbq at different temperatures & different times. Some people can be quite opinionated about what is best, but whichever method you are using, you have to nail the collagen to gelatin transformation to get the desired texture you want.
Just remember to identify the temperature target and make sure it spends enough time at temperature. Once you have this mastered, this is where things get fun: seasonings.
Seasoning
The collagen to gelatin transformation is essentially a prerequisite to good barbecue, but that can also be done in an oven or in your crockpot. What makes barbecue, well, barbecue is: the smoke, the dry rubs, and the bbq sauces, so let's break them down.
Smoke
How does smoking work?
Smoke is quite literally just seasoning. Like ground pepper or chile powder, smoke has a distinctive taste that adds to the eating experience. As smoke moves over the food, those small smoke particles stick to the exterior of the food.
Just take a look at the before and after of this cauliflower. You can see the smoke particles that have stuck to it.

From a basic experiment shown in the Science of Great Barbecue and Grilling, they placed two cans in a smoker for 30 minutes and clearly, the ice water can attract a lot more smoke due to two factors:

Cool surfaces attract smoke due to thermophoresis
Smoke sticks better to wet surfaces
Knowing this is why people do things like:
Use cold meat from the fridge right to the smoker
Use a water pan in the smoker to maintain high humidity
Maintain a low smoking temp to minimize drying
Spritz meat with water, vinegar, or apple juice
Add sauces or glazes to meat
All of these techniques help capture the smoke particles.
Smoke particles stay almost entirely on the surface of the food as they cannot penetrate more than 1/8 of an inch into the little cuts in the meat. That coveted smoke ring you see in brisket or ribs is actually not due to smoke particles but because of invisible gases. Nitric Oxide and Carbon Monoxide lock in the color of myoglobin in the meat, maintaining the reddish-pink color that it is when raw.
Using those techniques from earlier is a great way to achieve that smoke ring every bbq enthusiast loves seeing.
The takeaway here is smoke particles stick best to cold and wet surfaces, but we also have to understand what type of smoke is best.
Types of Smoke
As Meathead points out, there are 3 types of smoke:
Pale blue smoke
Pure white
Dark smoke (gray / black)
The difference? Particle size and flavor.
Pale blue is what you are looking for: it has the smallest particle size which sticks better and thus tastes better.
Pure white has larger particles. It’s the smoke that happens when a fire is first started.
Dark smoke happens when fire does not have oxygen, and it can make the food taste bitter and sooty, so it should be avoided.
Smoker and Wood Types
In general, the 4 fuel sources for smokers are wood, charcoal, gas, and electric, and each provides different flavors.

Most of these fuel sources use a wood product to actually provide the smoke, like placing wood over charcoal, or wood chip packets for gas.
Now in general, the benefits of gas and electric are the temperature control, convenience, and versatility, while wood and charcoal give you a more interesting smoky flavor, but it can be a bit hard to maintain those temps, especially for a long cook.
Pellet grills are interesting because you get the robust smoky flavor since you are using wood as the heat source in the form of pellets, and you still get all of the temperature control, convenience, and versatility of gas and electric.
For example, the Ironwood 885 can heat from 165 F up to 500 F, so you can smoke low and then at the last minute heat it up for a nice sear, it has an app that can monitors the heat of the inside of the smoker and the heat of your meat, it gives you a notification when you are running low on pellets and the pellets themselves are incredible at creating that concentrated source of pale blue smoke that is coveted. It literally makes it so easy to get great tasting barbecue.
That being said, all those features generally make pellet grills the more expensive option on the market, but whatever you get for your backyard remember to focus on the fundamentals we've discussed today and you'll be churning out great bbq.
That being said pellet grills are expensive. I'd love for everyone to get a Traeger for their backyard, but that's not going to be an option for everyone, so whichever setup you do pick just focus on the fundamentals we've discussed today and you'll be churning out great bbq.
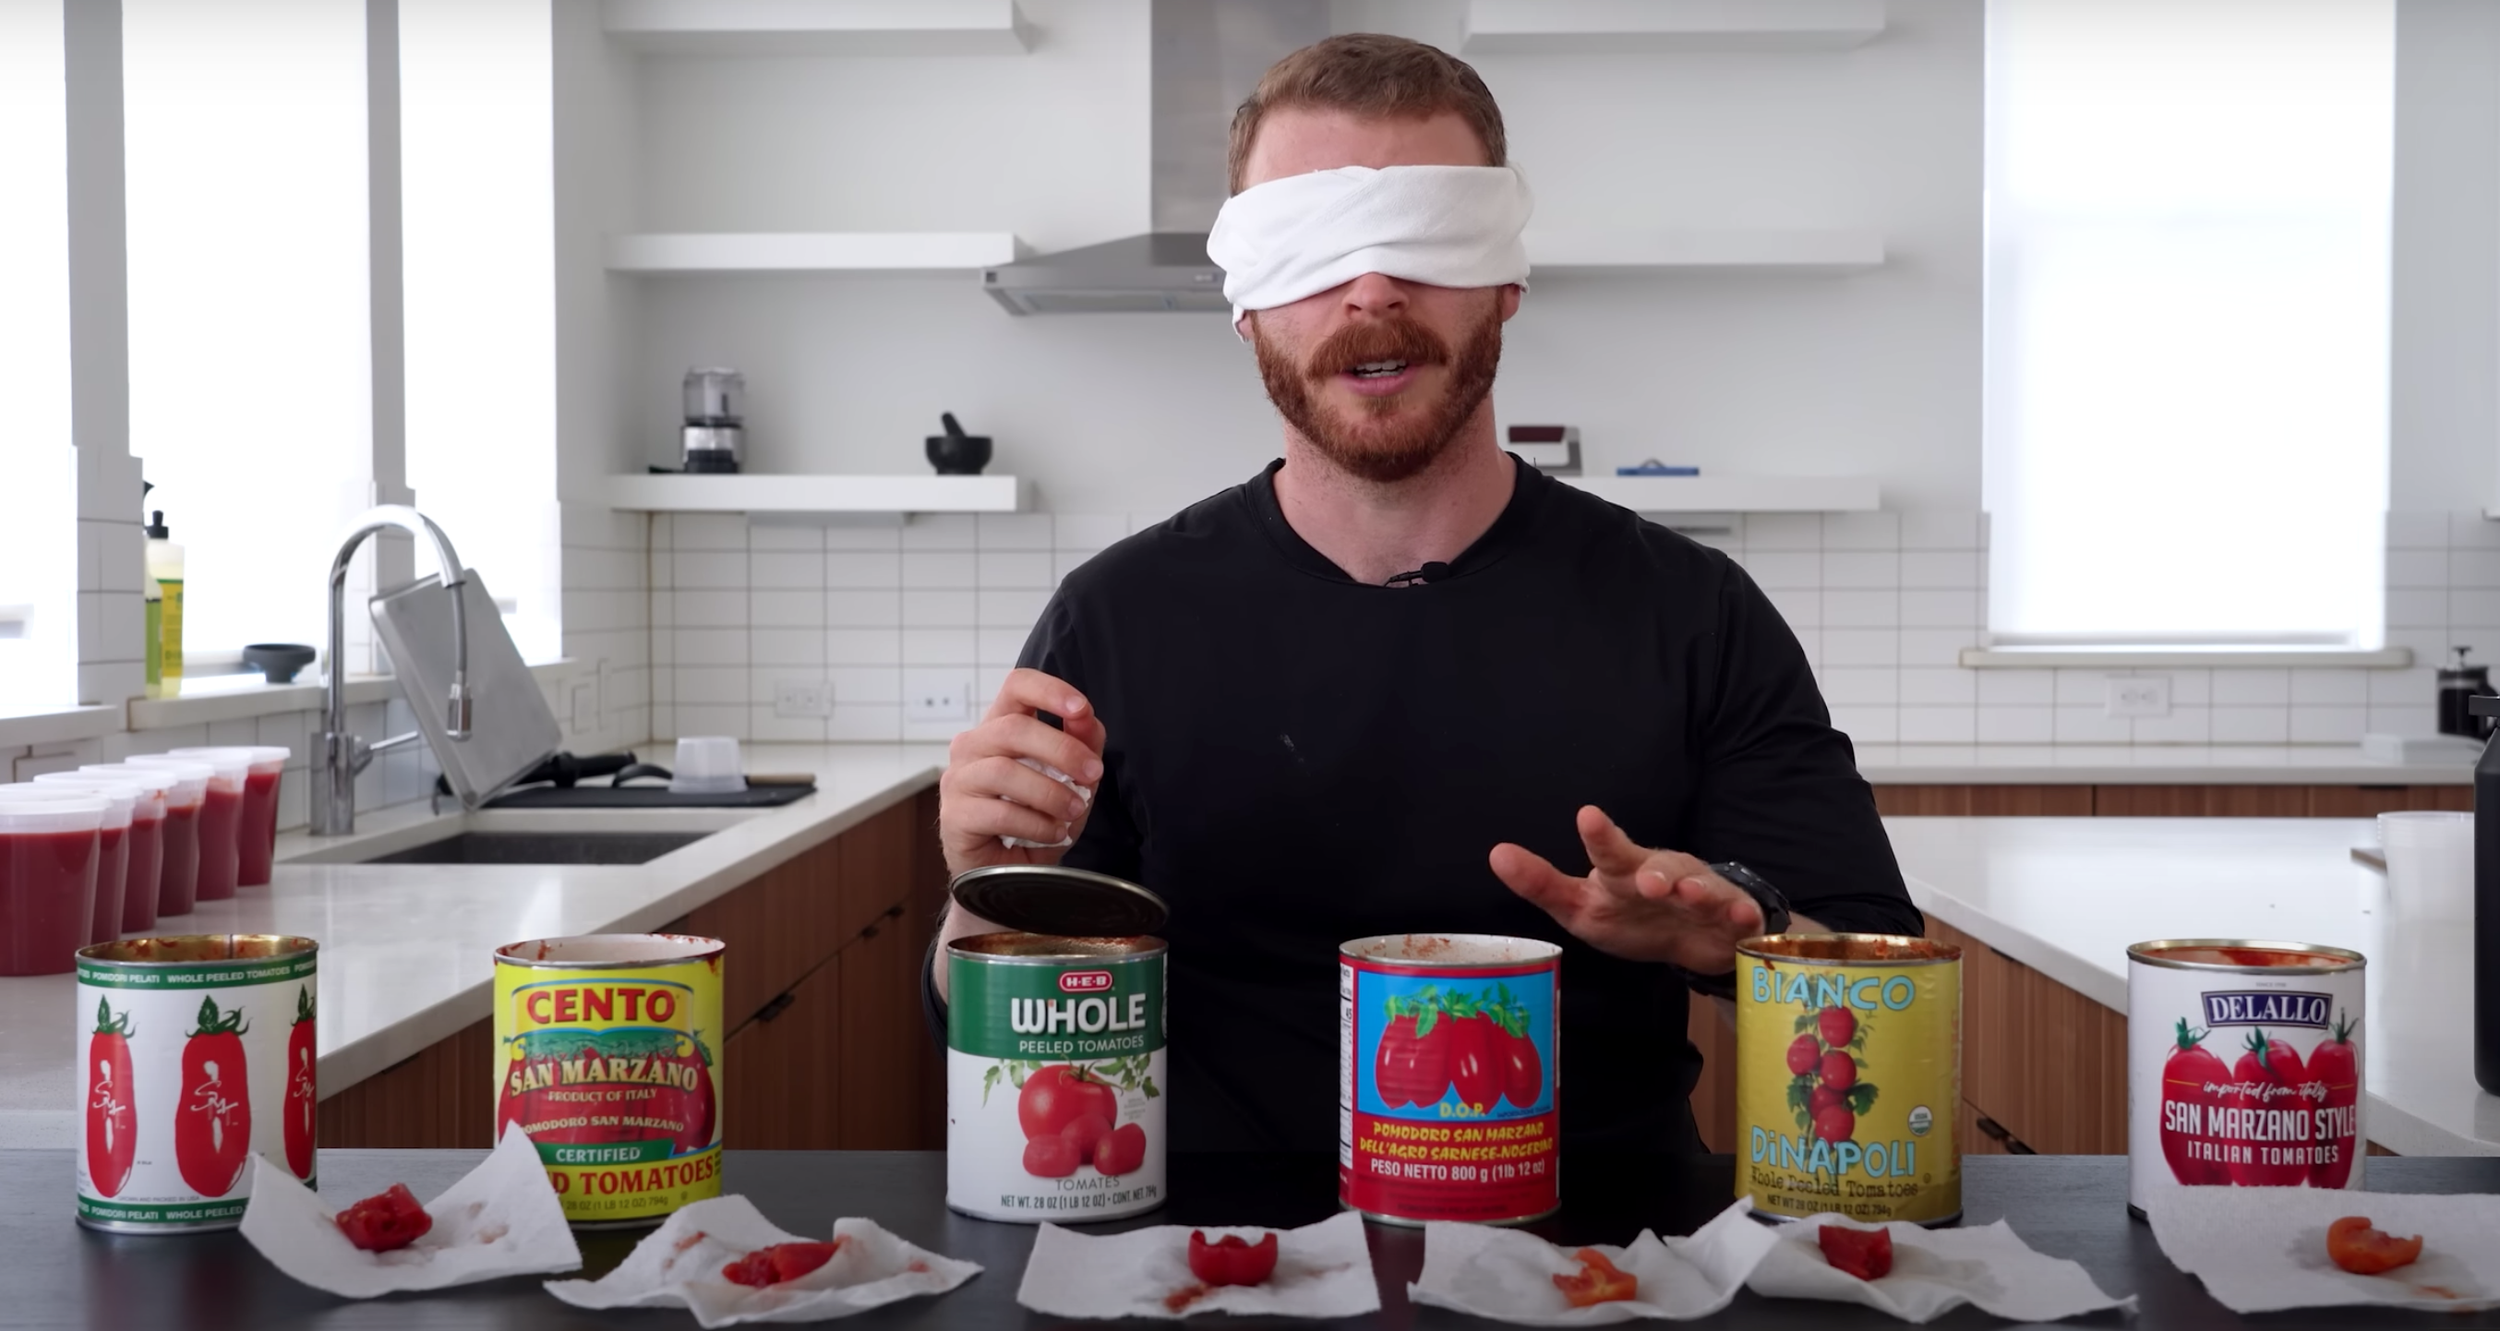
What wood should I use?
Now as far as types of wood, there are countless options. From apple to hickory to mesquite, which one is best? It might not matter. Meathead points out:
The quality of the meat, the spice rub, the sauce, and the temperature affect the final taste profile far more than the name on a bag of wood.
Goldwyn, Meathead. Meathead: The Science of Great Barbecue and Grilling (p. 18). HMH Books. Kindle Edition.
Now, this isn't to say that wood doesn’t make a difference. For example, apple chunks can give a steady smoke, cherry can impart a more reddish color, but as long as you have clean wood designed for smoking you are going to end up with something delicious.
Now here is a pellet chart that Traeger uses for classic and the science of great barbecue breaks wood into Mild and strong woods which I have denoted on the chart.

Case in point, get your temperature, meat, dry rub, and sauce in order before getting overly analytical about your wood choice.
Dry Rubs + BBQ Sauce
Dry rubs and bbq sauce are really down to preference and each region in the United States has opinions on what is the best, but like I was saying all good barbecue starts with that texture you have created internally through the collagen to gelatin transformation.

I may think Carolina gold is the best sauce on ribs, or a pepper-heavy dry rub is best on brisket but you may completely disagree. So I'm not here to tell you which is best, I'm just here to break it down.
In general dry rubs and bbq sauces externally season the meat, just like smoke. Though there is a bit of technique here as well.
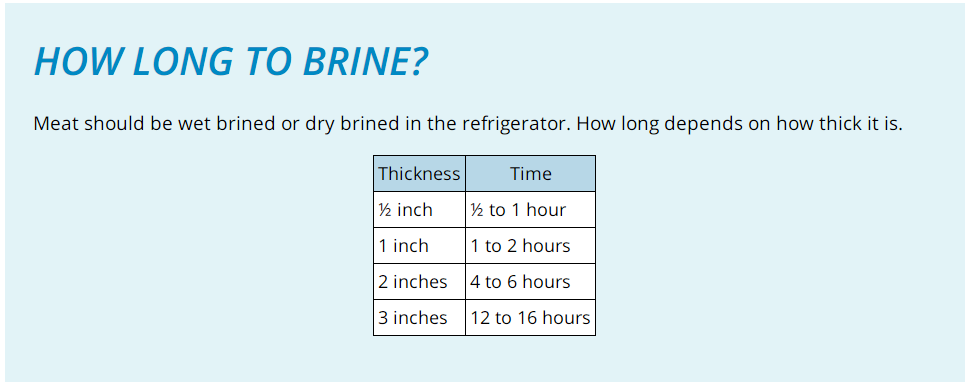
Before we get to the rubs, let me first say, if you have the time wet or dry brine your meat, do it! I've touched on this in several other videos, so I'll be short here.
A Note on Brining
Brines internally season the meat and help with moisture retention. I salted each of my cuts the day before cooking and left them in the fridge overnight but here is a quick chart showing how long you'll typically need depending on the thickness of the food. Also if the meat is brined make sure the rub you make or use does not have salt added or else that meat is going to be over salted.
Rub Example
So spices in rubs do not penetrate more than in 1/8th of an inch into the meat so there is no real reason to put them on the night before. The brisket was actually the only cut of meat I decided to make a rub for which was
25 grams of ground black pepper (~3 tbsp)
15 grams of sugar (1 tbsp)
7 grams of onion powder (1 tbsp)
2 grams ground mustard (1 tsp)
3 grams garlic powder (1 tsp)
2 grams chipotle powder (1 tsp)
To apply a rub, I splashed a little water on the exterior which helps the rub stick since it's dried out a bit in the fridge overnight. In other preparations, you may see people use mustard, vinegar, or oil all of which help the rub stick to the exterior.
Sprinkle the rub from high up above over top ensuring you get even coverage and then pop that baby on the grill and away you go.
Through smoking, the exterior of the brisket darkens and forms that beautiful bark that is honestly my favorite part of the whole thing. For my preference, I tend to use a rub if I'm not going to slather a sauce on to cook.
Sauce Discussion
In general, there are two ways to use bbq sauces. Use it during cooking or as a table sauce.
For use during cooking (such as a mop sauce, a thick sauce, or a glaze), it does a couple of things:
The sauce is a wet surface that attracts smoke
If the sauce has sugar, it caramelizes from the heat
The sauce flavors deepen as it cooks
In the video, for example, I made 3 bbq sauces.
First, a mayo-based Alabama white sauce. This one was strictly a table sauce for the chicken after it had been cooked. Highly recommend giving this a shot.
I also made a Carolina gold bbq sauce: a mustard-based sauce that is my personal favorite for pork ribs or pulled pork. This was slathered on the ribs for the last 30 minutes of cooking to caramelize and become a slightly sticky coating. It becomes infused with the ribs themselves instead of just squirting some on at the table.
My third sauce was a classic KC-style barbecue sauce which was used as a coating for the cauliflower during cooking and then kept as a table sauce for the brisket. I generally like my brisket plain with the rub, but it's good to have on hand for sandwiches or leftover brisket tacos.
Whatever you end up doing for your bbq gathering, I think it's fun to give guests options on what they can choose, so have some fun.

Conclusions
In conclusion, here's the short list of key take aways from today's video.
Above All: Achieve the collagen to gelatin transformation
Identify the target temp of the cut of meat and allow enough time for the meat to fully tenderize.
Core Concepts to Master First:
Choosing a cut of meat
Identifying target temp and time for the collagen to gelatin transformation
Choosing a smoking wood
Understanding how cold and/or wet surfaces attract smoke
Using dry rubs thoughtfully
Using BBQ sauces for texture and taste
Then expand your knowledge by:
Experimenting with wood types
Experimenting with cooking times (lower temp for longer, higher temp for searing at the end)
Experimenting with rubs (Start with Salt + Pepper)
Experimenting with technique (wrapped vs unwrapped)
Experimenting with moisture (moisture pan / spritzing meat / sauces)
You can watch the full video on this topic here.
Sources
Books:
▪ Meathead: The Science of Great Barbecue and Grilling:
▪ On Food and Cooking by Harold McGee:
Articles:
https://blog.thermoworks.com/beef/smo...